Pin It button on image hover
Showing posts with label Breath of Spring. Show all posts

Saturday, 19 February 2022

The Lovely Breath of Spring by Doreen

The Lovely Breath of Spring

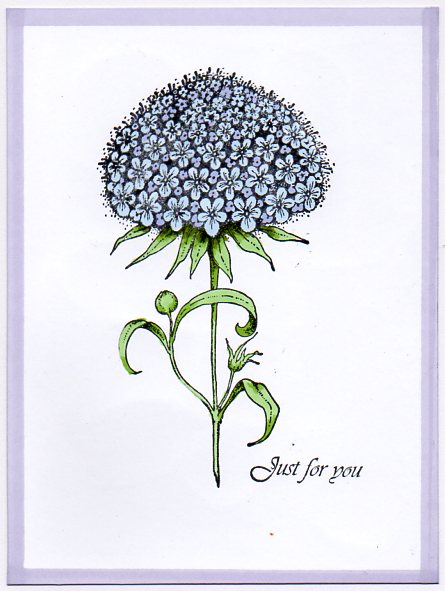
Hello to everyone here is the second of my posts this month a truly beautiful stamp it is the Breath of Spring DL set of stamps and obviously contains more than those featured in the photo below.  


Firstly I stamped the main image using Versafine Warm Breeze and Verdant, let dry. Once dry using a anti static pad  over card before stamping the corners using a juicy Versafine Clair Nocturne, then stamp the sentiment quickly before covering all the images with Clear  Embossing Powder, use a heat gun to set.

I used Koi Colouring Brush Pens to colour the image putting the colour down on a mat and picking it up with the blender pen to colour.


Thank you for popping in today

Love Doreen


Saturday, 20 January 2018

Springtime Canvas (by Penny)

Hello everyone, Penny is back with another beautiful project to share with you today. You are sure to be inspired by her pretty canvas.

Penny writes:

Hello there, I have a mixed media canvas to share with you today featuring some more beautiful Spring floral stamps from Chocolate Baroque. I have used stamps from the Hyacinth, Lily, and Breath of Spring stamp sets; acrylic paint, black Versafine ink, Distress Inks, Liquid Pearls, and Stickles.

I took a small canvas and stamped a hyacinth directly onto it using black ink then embossed with clear embossing powder. I masked the image with masking tissue and repeated the process twice. I then painted the whole canvas with blue acrylic paint. When the paint was dry I sponged over it with silver acrylic paint to add texture. I then stamped and embossed some silhouette images randomly onto the canvas. I removed the masks and painted the flowers in a Folk Art style to make them look more realistic.


I stamped and embossed the poem from the Breath of Spring stamp set onto a piece of white card, then tore the edges to give them a shabby distressed look. I blended Distress Ink over the whole piece then edged it with a darker tone. Next, I stamped and embossed a butterfly from one of the silhouette images onto another piece of white card. I painted it, cut it out, and attached it to the canvas by the body only, to create movement with the wings.I attached the poem in 3D as well. I added Liquid Pearls to the silhouette images and Stickles to to the centres of the flowers. To complete the piece I rubbed silver gilding wax around the edges of the canvas.

I hope that you have enjoyed this post, I really enjoyed creating the canvas and showing you how I did it! There are step by step details and pictures on my blog.

Happy Crafting Everyone!

Penny x

Thursday, 21 December 2017

Flight of the Butterfly by Brenda


Hello Peeps, are you all ready for Christmas, I do hope so as suddenly it is almost upon us ? 

It's my turn to share some more inspiration from Lesley's November shows on Hochada which was all about beautiful Blooms and Butterflies. For my card at the top I used Distress Inks to create a really intense background as a backdrop to the Butteflies from Tangled Garden. Onto the background I stenciled some leaves from Useful Leaves and a corner flourish using texture paste. After stamping with Versafine Black I cut out the three Butterflies and coloured them with sparkle pens, added wire antenna, fixed onto the base and stamped a sentiment from Words of Inspiration.


This is another of my backgrounds that I referred to earlier this month, again using acrylic paints and crackle glaze. The focal bloom is from Lily Fuchsia and Hyacinth multibuy stamped with Versafine Black and also leaves from he same set.  I added a little colour to the flower with pencils and matted and layered onto coordinating cardstock. If you have time to make up some backgrounds as I do, then it makes it really quick and easy to assemble a card.


More oxide inks this time using offcuts which I always keep as I am quite keen on triptych style cards. Using Versafine Black I stamped three different flowers from Lily Fuchsia and Hyacinth multibuy, coloured with pencils and added some cord and a sentiment from Birthday Words .


I used regular Distress Inks to create the shaded background onto with I stenciled some flourishes and then stamped the bloom from Breath of Spring, coloured in with pencils, added a sentiment from Birthday Words, some stickles and ribbon.


Using the Versafine Black and the corner stamps from Lily Fuchsia and Hyacinth multibuy I created a frame onto a piece of Design Paper. Into that I stamped the Lily from the same set, coloured in with pencils, added a sentiment from Birthday Words and some ribbon to finish.

As we are only days away from 'the' day I would like to wish you all a very Happy Christmas and a crafty 2018.

Monday, 18 December 2017

Hyacinths and More (by Julie)

Hi there, thanks for stopping by. Here are three more floral ideas that I made for Lesley's Hochanda TV shows.


My first card is stamped with Breath of Spring. The focal flower was stamped onto water-colour card  with Onyx Black Versafine and coloured with pencils before adding Crystal Stickles. The background is a mixture of Brusho powders and once dried acrylic paint was sponged through a circle stencil. White Gesso was painted around the flower to make it stand out from the background and the card was finished off with a sentiment from Birthday Words.


My second card is made from one of the smallest stamps from the Lily set. I inked up the little foliage stamp with dark green Versafine and repeatedly stamped it in a circle design. No special measuring or positioner was used. The trick is to move the stamp around so the little hook on the end of the design forms a circle which you can see in the centre of the design. The background has been coloured with Distress inks and the sentiment is from Birthday Words.


For my last card I have used the very versatile Hydrangea Tag.
The centre panel was stamped with the script stamp which I inked up with a plum coloured dye ink. I stamped it several times to cover the panel before colouring the background with Distress inks. The little tag design was stamped with the same ink, coloured with Distress inks and then cut out. I threaded silver elastic cord through the tag and around the centre panel before mounting onto the card with foam pads. 
The base card was stamped with the Hyacinth from the Hyacinth set which I inked up using the plum ink as before.

Many thanks for looking.

Best wishes
Julie xx

Saturday, 16 December 2017

Flower Cards (by Magda) -

Hello girls,  I want to share with you three cards I made with the lovely stamps that Lesley demonstrated during the December TV Shows.

These projects have used the same technique : I used Versafine Onyx Black for stamping
Hydrangea  Tag
Lily
Breath of Spring 
and coloured the flower with Distress Ink Pad  .  I spritzed the background of the mat with the same Distress colour and stamped again part of the stamp on the background of the card.
I used some  Stickles on the flower and some mica too to lighten the cards


I hope you liked my projects today and I wish you a nice crafting week.
Magda

Thursday, 7 December 2017

Imagine by Brenda


A very good morning, Brenda here with today's share of more samples from Lesley's recent Hochanda shows which featured he most beautiful floral and Butterfly stamps that were a joy to work with.

My starting place for the above card was a background of Oxide Distress Inks which like so many of us I am totally addicted to. Onto the background I stenciled an arch window using Distress Ink, stamped what is probably my favourite Chocolate Baroque sentiment from the Words of Inspiration stamp sheet using Versafine Toffe and using the same ink stamped a selection of leaves around the edge from the Tangled Garden stamp sheet. The beautiful Butterfly is from the same set stamped onto Bristol cardstock and coloured with distress inks, the same colours as the background but not Oxides as I find the chalky finish can detract from the detail of the image.


For this card I used the blooms from Bold Blooms and leaves from the same set and Tangled Garden, stamping all onto a piece of card coloured with Distress Inks and Pearl Mica Spray, I like to add that to inky backgrounds sometimes as it helps to bleed the colours and also leaves a nice sheen. I used a piece of torn paper to create a sunray effect when I wanted to place the flower which I layered up after cutting our three different sized blooms . I cut he leaves out and arranged onto a hand drawn stem with a little bit of doodling to ass interest. The lovely Wordsworth quote is also from Bold Blooms.


I had an idea to create a shadow box surrounded by Butterfly, so started out with the base made using a die set. I coloured a large sheet of card with Distress Oxides concentrating on keeping within a tonal colour palette of oranges and yellows. Onto that I stamped several Butterflies from Tangled Garden and cut out ready to assemble around the frame. The fairy within the aperture is from June Fairy set and grasses from Silhouette Grasses stamped with Versafine Toffee and a masked and inked background plus a few small stamped Butterflies. Finally I layered the Butterflies around and within the layers of the shadow box.


This one to coin Charlie of Hochanda's words is "heavy on the grunge", I started with acrylic paints and brushed them randomly over a piece of 600gsm Fabriano cardstock, it's so sturdy that it takes water and wet mediums without warping. Next added some texture paste through a stencil to the top corner and applied some gilding polish to lift the pattern. I also added some gold gilding flakes here and there. The Lily is from the Lily Fuchsia and Hyacinth multibuy stamped with versamark and heat embossed with copper detail powder and then colour added using the same acrylic paint as the background, the sentiment is from Birthday Words and finally some lace tied across the bottom.


On the rare occasion I find myself with time on my hands I make up a batch of inky backgrounds as I find it really handy to have some in reserve when I am up against the clock to get sample made. This is one of those using acrylic paints and crackle glaze onto which I randomly stamped a sentiment from Birthday Words and then the focal bloom from Breath of Spring  using Versafine Black and then colourd in with sparkle pens and stickles. The base has been stamped with several of the foliage stamps from the Lily Fuchsia and Hyacinth multibuy.

As always my thanks for taking the time to visit today.


Wednesday, 24 May 2017

Rustic Spring Tag (by Penny)

Hello everyone, today sees the last of our visits this month from Guest Design Team member Penny Butler. She has created a fabulous folk art style tag as her project for you today.

Penny writes:

I used stamps from the Breath of Spring stamp set, acrylic paints, gold embossing powder, and gilding wax. I created a crackle background on a tag, and stamped the large floral image in black ink. I painted the image using a folk art technique.

I embossed some swirls and a sentiment in gold, then added some gilding wax and a ribbon from my stash.

Thank you Penny for another inspirational project. You can check out more details from Penny's tag on her blog. Penny will be back with more projects later in the year.


Tuesday, 18 April 2017

Russian Floral (by Asha)

Hello, everyone. Now that the Easter celebrations are over, I hope you are able to find some time for a spot of therapeutic crafting.  And to inspire you here's a project featuring the new Russian Floral Egg.


Here's what you do:

  1. Stamp the Russian Floral Egg onto a piece of blue cardstock using Versamark.
  2. Apply WOW Gold Rich EP and heat set.
  3. Colour the egg with coloured pencils. Fill in the open spaces, add shading around the embossed areas for a sense of dimension.
  4. Apply a dusting of Distress Inks around the card to achieve a "velvety" effect. I used Chipped Sapphire and Seedless Preserves
  5. Finally, frame the egg by stamping the four corners of the cardstock with a stamp from Breath of Spring and VersaFine Imperial Purple. Embellish the egg with bling or pearls.

Five easy steps but, oh, quite impressive, don't you think? Go on, give it a go. There are 2 egg designs to choose from. You could start your very own collection of Faberge inspired eggs. 

As always, I have more pics and details on my blog. And please swing by often for more project ideas from the rest of the team. Have a lovely day, everyone!

Beijinhos,
Asha

Friday, 31 March 2017

Love Spring (by Julie)


Hello and thank you for stopping by. Spring is my favourite season so I really enjoyed playing with the Spring themed stamps that Chocolate Baroque have featured this month. The stamp set used for this card is Spring Foliage, hope you like it.


Start by inking the edges of the base card with Dusty Concord Distress ink and then cut a piece of stamping card slightly smaller than the card base and die cut a heart from the centre. Stamp the Bluebell flower onto the die cut heart and colour with watercolour pencils and Distress inks. For decoration I added three flat back gems to the top right of the heart and the Spring sentiment to the left. (The sentiment is from Breath of Spring)
Stamp the Spring Foliage around your previously cut stamping card and colour with Distress inks. To create the shadow, just stamp again without re-inking.
Assemble the card by placing the heart in the centre of the card blank and gluing into place then using 3d glue gel, adhere the stamped foliage card onto the card blank, making sure that the die cut hearts match up.

Thank you for taking a peek at our blog. Please call back again very soon for some more Design Team inspiration.

Julie xx

Sunday, 26 March 2017

Vintage Birdie Spring Card (by Anne)


WOW, the shows with the Babushka and Russian stamps this week were simply FAB. So many lovely samples from my Teamies and great demos from Lesley.

This morning I am sharing a Spring themed card with you – a Vintage styled project using the Spring Bird Crocus set. I hope that you like it x
 
Materials:
  • Spring Birds Crocus and Breath of Spring stamp sets
  • 8 X 8 inch card blank, 6 X 6 inch background paper from Crafty Individuals (Shades of Summer), white stamping card, green card and pink glitter card
  • Inkpads: Versafine (Vintage Sepia), Versamark, Distress Ink (Broken China, Tattered Rose)
  • Heat embossing powders (clear and gold sparkle)
  • Watercolour, sparkle and glitter pens (yellows, blues, pinks, greens)
  • Alcohol marker (pale blue-grey) and metallic marker (gold)
  • Glitter glue (gold)
  • Trellis die (to cut glitter card border – a paper doily would also work well)
  • Metallic thread (gold) and acrylic gems (gold)
How it was done:
  1. The bird scene, sentiment and border were stamped onto the patterned paper with Versafine and embossed with clear powder. Water based pens were used to colour. To bring out the scene a little more from the background I used a grey marker to add a drop shadow.
  2. The scene was stamped a second time onto white card, coloured and cut out for decoupage.
  3. Broken China Distress Ink was blended in from around the edges. The topper edges were then embossed with a little gold sparkle powder. Decoupage elements were glued down with 3D glue gel.
  4. The topper was matted onto green card. I used an offcut from a Trellis die cut (pink glitter card) to layer behind the topper left hand side. Gold thread was added for extra sparkle and texture. A square paper doily tinted with Distress Ink would also work really well if you don’t have dies.
  5. The background card blank was stamped using Tattered Rose Distress Ink. Broken China Ink was used to blend in from the edges, and the gold pen used to edge the card.
  6. I finished with gold glitter glue and gems (I cannot resist a bit of bling).

Friday, 24 March 2017

allium by Veronica

A very simple card today using the lovely big allium stamp from breath of spring set.
The base card is 5"x7", and the white card I stamped the image on was 4.5"x6.5" - as you can see, this is a large stamp, measuring over 4" in height.  It was stamped in black memento ink, as was the sentiment from words to dazzle and sparkle.
I coloured the image using blue, lavender and green alcohol markers, and edged the card with the lavender marker to give the impression of a matt before adding to the base card.
A very quick card, and a general purpose sentiment to cover almost any occasion.

I hope you are enjoying the new shows on Hochanda today, there are some stunning samples from the girls which will be on the blog soon.....

Monday, 13 March 2017

Daffodil Fold Back Card (by Anne)


Good morning. Here is another of my blue & white monochrome show samples using the Spring Bird Daffodil and Breath of Spring stamp sets. Cannot stop making these – they are just so effective.

Materials:
How to make it:
  1. Open out the card blank and randomly stamp the inside with the leafy swirl. Edge with Distress ink to frame.
  2. Score the front of the card vertically in half and fold back the front. Glue down ribbon.
  3. Cut two squares. Stamp one with the sentiment and decorative corners. Edge with Distress Ink and glue to the card inside.
  4. Stamp the second square with the Daffodil and sentiment. Using a damp brush drag out some of the colour. Add more colour by picking up ink from your craft mat using a watercolour brush. Paint in extra shadows – use the stamp detail as a guide. Glue to the card front overhanging the folded back edge.

Saturday, 11 March 2017

spring flowers (by Veronica)


First a very simple card using the spring bird tulip  stamps .
.

The tulips were stamped in black versafine ink and coloured with watercolour pencils. Background sqaure card was colopured with peeled paint distress ink using a brush, then the small tulip stamp stamped randomly in the same ink. The mat is gold mirri card, which doesn't show up as gold on the scanner.
This one was a bit more complicated, but still quite a quick card.
I die cut a circle of white card and stamped the tulips again in versafine, then masked them off with masking fluid; stamped the daffodils from spring bird daffodil to each side of the tulips, then rubbed off the masking fluid.
Coloured the tulips first using plenty of colour, then the daffodils using less colour.
A die cut green scalloped circle matt, and the corner swirls from breath of spring stamped onto the corners of the card blank using peeled paint distress ink to finish it off.

Both card blanks are 6" square, so easy to post

Friday, 10 March 2017

A couple of projects (posted by Claire)

Good morning, Claire here with a couple of mixed media projects made for Lesley's recent shows on Hochanda. The first features the beautifully detailed bird stamp from Spring Bird Crocus and the second uses one of the smaller stamps from Breath of Spring.


For this first project I began by applying texture paste through a woodgrain stencil onto a little MDF bird house blank. Once that was dry I added some colour with acrylic paint, shimmer spray and distress ink

I stamped the bird and coloured the image with pencils before cutting out and layering the image up over some scraps of hessian, lace and ribbon from my stash. I topped the birdhouse with some raffia and a little wooden button. Here's a closer pic of the image:


My second project today is this little charm made using the beautiful butterfly swirl stamp from Breath of Spring. I took a couple of microscope slides and gently rubbed a versamark ink pad over one of them before applying PanPastel in shades of Magenta ( I used Magenta, Shade and Extra Dark). I glued the other slide to the back with glossy accents and then stamped the image onto the front with versamark before embossing with Silver embossing powder. It really pays to use an antistatic bag when embossing on glass as lots of the powder sticks to the surface.


I stamped the butterfly on acetate and again embossed with silver, applying versamark and more PanPastel to the back. I cut the butterfly out and stuck it to the image with more glossy accents. I attached a glue on bail to the top of the slide and a little filigree corner to the front, bending the corners around the glass very gently. Once everything was dry I added beads from my stash and a scrap of ribbon.

Thanks for visiting today, happy crafting. 
Claire xx

Thursday, 9 March 2017

Spring Time Pastels (by Judith)

Hello everyone, I have a couple of projects from last month's TV shows to share with you today. My projects feature a selection of the Spring stamps, using a mixture of techniques, so hopefully I can give you lots of inspiration in just a few minutes!

For my first project, I created a background using Pan Pastels on a piece of smooth white card. I used  shades of yellow and orange and added a hint of Plum Pan Pastel around the edges. Using Versamark Ink, I stamped the butterfly flourish image randomly over the background, and dusted Pan Pastels over the top to complete the background.

I die cut a rectangular panel and stamped the two butterflies from the butterfly flourish image onto the panel before masking them. I then stamped the lovely large flower image from the Breath of Spring stamp set, and also masked this image. I added Pan Pastels, using a selection of yellow and orange colours to create an ombre background, starting with the lightest colour at the top, graduating down to the darkest colour at the bottom. I removed the masks, and coloured the images with pencils, before adhering both panels to a large white card blank.

To create my second project, I covered a large Tando Tag with a piece of watercolour paper that I had coloured myself with Distress Ink, using pale pink and green inks. I stamped some foliage over the background to give a feeling of depth using the same pale green ink, using an image from the Spring Foliage stamp set. I edged the tag with Victorian Velvet Distress Ink, and stamped the pretty bird image from the Spring Bird Crocus stamp set onto the tag. I added a sentiment from the Glorious Spring stamp set. I coloured the images with pencils, as before. To get my ribbon to match perfectly, I took some pale cream ribbon, and ran it through some Victorian Velvet Distress Ink and water that I had placed onto my craft mat. I simply dried the ribbon with my heat gun, and ironed it on a low setting.

Thanks for stopping by, Judith xx

Friday, 3 March 2017

Butterfly Stepper Card (by Anne)


Good morning. Today I am sharing another of my show samples using the Breath of Spring stamp set. The butterfly swirl can be used to make lovely backgrounds but it also works well as the main decorative feature. I used sparkly black embossing powder for added dimension (a bit difficult to see in the pic). I stamped and cut out extra butterflies and used them to embellish this stepper card, along with some die cut swirls and paper punched flowers. I also used a pretty background paper from Crafty Individuals (6 X 6 inch pad – Springtime). Victorian Velvet Distress Ink was used on the card blank and edges.

I cannot wait for more shows coming at the end of the month. Lesley will be bringing us something a little different. My lips are sealed – tee hee x.

Thursday, 2 March 2017

Spring Allium (by Asha)

Good morning, friends! Here at Chocolate Baroque spring is definitely in the air. My first offering to the DT Blog is an all purpose card from the aptly named stamp sheet called Breath of Spring.

I started by inking the edges of the card with Distress Ink Aged Mahogany. Next, I stamped the allium: the stem in Memento Tuxedo Black and the flowerhead with Ranger Archival Cobalt. To frame the focal image I stamped the swirly corners from Breath of Spring using Ranger Archival Plum.  Finishing touches include blobs of liquid pearls, glitter and baker's twine.


These are probably not your typical spring colours, but no harm in stepping out of the norm every now and again!

I've got more details of tools and products over at my blog. My team-mates have created a few vernal beauties with this stamp to inspire you. And make sure you swing by the DT blog for more project ideas using Chocolate Baroque spring themed stamp sets featured on Hochanda.

Thank you so much for stopping by today.

Beijinhos,
Asha

Tuesday, 8 March 2016

Pink and Blue (posted by Judith)

Hello everyone, I hope that you are enjoying the fabulous artwork created by my Design Team mates using this month's Babushka stamp set. I absoloutely love the versatility of this quirky stamp set, and the many possibilities that the stamps offer. I have two cards to share with you today, in very different colour options.

For my first card, I created a wrinkle free Distress background, and stamped the three dolls onto some white card using white embossing powder. I also stamped the face areas again onto some spare card using black ink. I coloured the images using water based markers and a water brush.

I die cut some hexagons, and stamped the flower head from the Breath of Spring stamp set on to the hexagons, again using white embossing powder. I coloured the hexagons using tones of blue Distress Ink, to match the Babushka dolls.  I ironed off the white embossing from the hexagons so that I could add faux stitching to the edges. I also added faux stitching around the edge of the background. Finally, I added a sentiment from the Amazing Birthday clear stamp set.

My second card became a Mother's Day card for my Mum. She loves Russian dolls, and always wanted to collect them. When we were growing up, I always remember her hankering after them, but never being able to afford them. So, I thought that it would be lovely to incorporate some of the images into a card for her.

I stamped a window fragment from the Texture Fragments stamp set onto my background, and added gold embossing powder. Before using the heat gun, I stamped the large fragment from the Dusky Damask stamp set using a deep purple ink into two of the corners of the background, and added clear embossing powder. I then heat set the images.

I covered the background with a blend of pink and purple inks, before adding a stencil, and repeated the process, to deepen the colours. I stamped the Babushka images onto a spare piece of card, using gold embossing powder, and coloured them using toning colours. Finally, I added a sentiment from the For Mum clear stamp set.

I will be back later in the month with some more ideas using these lovely stamps, but do keep checking back to see what my Team mates have been up to. Thanks for stopping by, Judith xx

Wednesday, 21 March 2012

A Breath of Spring at Easter Time (posted by Judith)

Hi Folks, I have a sample that I'd like to show you today using the new stamps from the 'Baroque Eggs' stamp plate, combined with an old favourite of mine, 'Breath of Spring', and some butterflies from 'Just Butterflies'.

I have chosen to make my background using Distress Stains and the wrinkle free technique, this is so easy, and quick too. I have added the flourish butterfly from 'Breath of Spring with Mustard Seed Distress ink in opposing corners to the background. I have used yellow and purple shades to colour the stamped images, a nod to the crocuses that are starting to appear in our gardens at this time of year.

Keep popping back to see what the other Design Team members have come up with over the coming days. They have made some lovely projects. Thanks for stopping by, Judith xx

Monday, 27 February 2012

Breath of Spring (posted by Judith)

Hi folks, I'm back with another sample to showcase the great new stamp set Artistic Expressions available at Chocolate Baroque

The full details of how I made this piece can be viewed on my blog so you can hop over there if you are interested.


I thoroughly enjoyed making this piece, but with stamps like these, it's hardly surprising! I've used 'Artistic Expressions', 'Rose Tree', and 'Breath of Spring', all available on the website.

Keep checking back for more samples from the other Design Team members, and I'll be back in a few days. Thanks for stopping by, Judith xx